Thursday, June 30, 2011

The Dog's Days of Summer.

Photobucket
It's HOT HOT HOT!! Here in the south we've been seeing triple digit heat since April. Not that triple digits are unknown for us, but we normally don't start seeing them until atleast June. I've been posting DIY stuff for humans and almost forgot about our four legged friends (and in my case four legged children).


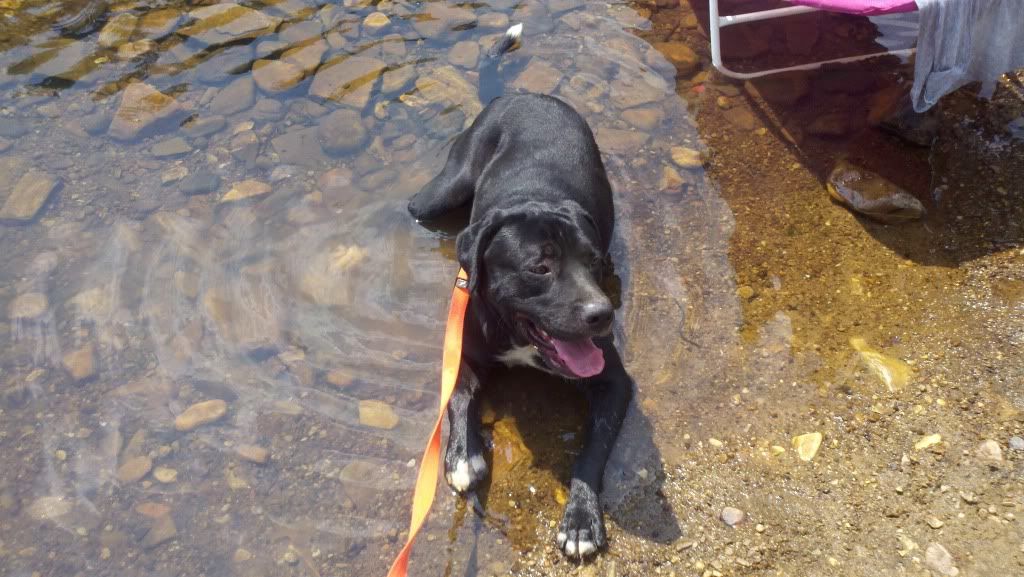
I have a Labrador/American Bulldog mix that the heat affects horribly. The poor thing, every year as soon as it starts even hinting at getting hot he starts scratching. And he scratches and scratches and scratches and scratches (you get the point) until he starts losing his hair and gets these nasty looking sore spots. I've taken him to the vet and have been told it is Demodectic Mange (for those of you with dogs and don't know what Demodex is...it's a genetic mange...99% of dogs have this mange it just doesn't always show up and is not contagious like Sarcoptic Mange). Keep in mind I came to own Dozer when he was only 3 days old because his mother died, so I raised him and 2 of his siblings on a bottle. (Wanna talk about a rotten dog with a capital R?) Apparently his immune system isn't the greatest and the heat stresses him out which causes the Demodex to flare up. I've been purchasing a flea medication that also treats Demodex but at almost $20 a vial it's getting to the point where I just can't afford it. I got in touch with a couple of vets online and this recipe was the general consensus on a homemade treatment for Demodex and the dry skin that accompanies it.

PhotobucketPhotobucket           Demodex Treatment
2 Tbsp Calendula
2 Tbsp Lavender
2 Tbsp Licorice Root
2 Tbsp Yarrow
Water
Apple Cider Vinegar
Tea Tree Oil
Spray Bottle

Combine the Calendula, Lavender, Licorice Root and Yarrow in a glass pot or bowl. (You may want to grind the Licorice Root a bit before adding it to the concoction.) Cover the herbs with 1 to 1 1/2 cups of water. Boil for 10 minutes either on the stove or in the microwave. Once boiled remove from the stove or microwave and cover and let it steep overnight. (If your house isn't generally cool you may want to put this in the fridge.) The next morning take out of the fridge and strain out the solid material. Get your spray bottle and before adding the liquid put 10-20 drops of tea tree oil in the bottle. (Start on the low end of the spectrum with Tea Tree as it can be an irritant on certain skin types) Next pour in the herb liquid. Then add 1/2 to 1 cup apple cider vinegar depending on the size of your bottle. (I used a small spray bottle that you might see in a beauty salon. Got mine for $1 at Family Dollar). Finally add 1 to 2 cups of water, again the amount depends on the size of your bottle. Once you've got all of that mixed shake it and then spray the affected areas on your dog. Do this once a day for awhile and you should notice a gradual disappearance of the rough spots and hair should start growing back in.
*DO NOT USE THIS MIXTURE ON CATS. Also be sure to SHAKE the bottle before every use.*

*This mixture worked very well on my dog but keep in mind it may NOT work for yours. For one, I KNOW my dog has demodectic mange where as if you haven't had a skin scraping done on your pet that resulted in a diagnosis of demodectic mange, the condition your loved one is suffering from may not be demodex at all but a bacterial or fungal infection or even the sarcoptic form of mange. I highly recommend taking your animal to the vet before you try ANY KIND of at home treatment. PnP cannot and will not be held responsible for the results others get from this recipe. This is for general and informational purposes only and the results found herein may not be typical. Again I reiterate, TAKE YOUR ANIMAL TO THE VET BEFORE TRYING ANY AT HOME REMEDY.*


Happy DIYing Everyone!!!


Tuesday, June 28, 2011

Burnt Out!!!

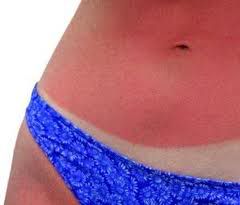
It's summer in the south and along with summer always comes family get togethers, BBQs, going to the pool, lake, pond, river (any water source that even remotely feels cooler than the outside air temperature). And of course another thing that always comes with summer and is the bane of anyone with fair skin, a SUNBURN.


Photobucket
I decided to do this one for my bf V. The girl is part vampire and freely admits it. (She's never tried to bite me but I can't say the same for anyone that has ever pissed her off :-p I love her anyways tho.) The sun's rays actively seek her out. About a month ago she was working on a project in her garage and still managed to get sunburned. Yesterday she was doing a grab and drive across several states (her man is on his way home...YAY!!!) and managed to get sunburned through the windows of her truck. Like I said the sun's rays actively seek her out. I'm sure that there are more people out in this wide world than just her with skin like that though. I am lucky in the fact that even being a redhead I only get burned one good time a year then it turns brown.

So for V and all the other half-vampires out there:

Sunburn Treatment
5 Black Tea Bags
3 Cups Fresh Mint
1 Quart Water

Boil the water. After the water has boiled turn it off and remove from the stove or microwave. Add the tea bags and mint.. Cover the pan or bowl and set it aside for an hour. Strain out the tea bags and mint into a 2 quart pitcher and refrigerate. Wait a few hours for the liquid to chill completely and then apply to sunburned skin with either cotton balls or by pouring the liquid directly on to the affected area. If you are gonna pour do it outside or in the tub or you'll have a minty, watery mess in your floor. I would even suggest putting the liquid into a spray bottle the way you don't waste any of it.

The mint will cool the sunburn and the black tea will draw out the heat. This combination restores the skin's natural acid balance.

I can't help you guys on the results of this one since I already got my yearly sunburn but I'll be more than happy to hear any of your results after you try it.

Happy DIYing Everyone!! 


Light Bulbs in the Sky

This isn't a problem that Rey tends to have to deal with.  The woman gets burned one day early in the summer, then from there on out proceeds to get progressively darker.  *mutters obscenities under her breath*  Me, on the other hand?  You'd think I was an albino the way I burn, and it never gets any easier to be in the sun, no matter how many times I burn.  I do eventually get something like a tan underneath the multitudinous masses of freckles that appear all over me like some contagious malady, but unlike some people *glares at Rey* that tan doesn't seem to offer any protection from burns.

There are all kinds of home remedies for burns.  The standard go-to that everyone has heard of is Aloe.  It's wonderful!  Especially if you can keep a plant of it growing in your kitchen for those "ah, hell" moments.  But unless your plant is spectacularly huge, that little plant isn't going to be nearly enough if you get sunburned on more than your nose.

So you go to the store and get one of those pump bottles of the aloe gel in the skincare aisle, right?  It's only a few dollars and usually lasts one summer.

Why?

Just go over to the baby supplies section, get an el-cheapo bottle of baby oil (I've found baby oil for under a buck) and slather it all over that sunburn.  If it's not a really bad burn, you won't have much soreness or tightness in the burn the next day at all.

Why it works:  the key to keeping a sunburn from being painful, tight, itchy and uncomfortable is -- yes I know, don't get one at all.  Hush you.  -- is to keep it moist.

You can do this in a lot of ways:  lotions, oils, ointments, creams, salves, balms, you name it.  Baby oil is cheap, never spoils, a single bottle lasts forever because it goes on so thin, and it's generally absorbed well by your skin and doesn't clog pores.  You could use lightweight cooking oils, if you're one of those that keeps something other than plain vegetable oil in your cupboard.  Olive oil, almond oil, grapeseed oil, etc.  But, those cost an awful lot more than a bottle of baby oil, and you must remember that we're the Peasant and the Pea, not the Princess.  So forking out $13 for a bottle of extra, extra, extra virgin olive oil, pressed in the hills of Tuscany by the feet of only the most virginal virgin village girls just so we can slather it all over our sun-seared shoulders is not exactly inside our price range here.

So go grab a bottle of baby oil, and let that 98 cents work wonders this summer, and next summer, and maybe even the summer after that before you have to cough up another $2, because you know inflation....


Monday, June 27, 2011

Conditioning Done Right!!!

Sorry it's so late yet again. I've been attempting to clean up what looks like a natural disaster in my house. Anyways on to today's DIY thingamajiggy.

With all the recipes I've been trying out over the past week my poor shower has been getting a real workout. I posted the shampoo recipe early last week so I figured I'd better come up with a good conditioner recipe. If you have hair like mine washing it just isn't enough. If I don't condition it as well I can barely get my fingers through it much less a brush. I have horrible naturally curly hair and at this point it's short. (Yea due to that pine sap/hair dresser incident I mentioned back in the Had It To *HERE* With My Hair post.) And it is either really really dry or really really oily depending on how often I wash it. So earlier tonight I was browsing through my collection of recipes and websites and found this little jewel. It is great for all hair types, dry, oily, etc.

Photobucket

Photobucket        Coconut Honey Egg Conditioner
        4 Tbsp. Coconut Oil
        2 Tbsp. Honey
        1 Whole Raw Egg

PhotobucketMix all ingredients together very well.(I mixed it all together in a 1 cup measuring cup.) Coconut oil solidifies so you may want to have a small pan of warm water to sit your container in to liquefy it before adding the honey and egg. REMEMBER though, you do NOT want to use water that is to hot because you do NOT want the egg to start cooking when you add it to the oil and honey. Apply the mixture to your hair and let it sit for 10 - 20 minutes. I wrapped my hair in a towel but I imagine a shower cap would work just as well. After it sits wash your hair thoroughly.  *Double the amount of ingredients for long hair.*


My hair is all soft and shiny so I'm pretty happy with the results.

Rated:
PhotobucketPhotobucketPhotobucketPhotobucketPhotobucket(5 Peas)


Sunday, June 26, 2011

It's Getting HOT In Here!!!

Photobucket How many of you suffer from the general aches and pains of everyday life? Raise your hands. *peers at her computer screen* Ok so that wasn't my brightest idea but I'm pretty certain alot of you know what I'm talking about. I myself suffer from old softball injuries. I blew out both of my rotor cuffs in high school pitching and my DH JB has bad knees from his job. The swelling and inflammation that comes with both of our injuries is almost unbearable at times and the price you have to pay for a good rub on cream is *OUTRAGEOUS*!!! Especially when it is quite simple to make yourself right at home and for a fraction of the price.

Most of the muscle/joint rubs and creams out there have capsaicin in them as one of their active ingredients. Capsaicin, simply put and for those of you that don't already know, is the active component of chili peppers which in turn belong to the genus Capsicum. It is what gives you that hot feeling when you rub one of those creams on your exposed skin. It has tremendous pain relieving properties as well as anti bacterial, antioxidant, antibiotic and anti inflammatory properties. (The list of Capsaicin's medicinal properties goes on and on so those are just a few.) And here's the happy news...YOU CAN MAKE IT YOURSELF!!! YAY!! No more paying outrageous prices for those smelly "old man" creams.

It's simple and cost effective.(Which is our mission here at PnP...finding those tips, tricks and recipes that make everyday life a little cheaper.) This is my next project I plan on starting either today or tomorrow. For the detailed recipe and article explaining how to make your own Capsaicin Oil to add to your favorite unscented lotion please click here. As with all of my other "guinea pig stunts" I will post my findings and feelings at a later date.

Happy DIYing Everyone!!!


Saturday, June 25, 2011

The Aftershave Effect.

Go to Google...click the shopping tab and type aftershave into the search bar. The top result when I did that was $49. Wait, WHAT?!?!? $49 for a bottle of scented stuff that men slap on their faces after they shave? Are you KIDDING me? This is what actually led me to starting this blog.

Photobucket

My husband asked me..."Rey, I know you like making stuff like this so can you make aftershave for me?" (OoOoOoOoooOoo a challenge has been issued) "Of course I can" was my reply. SO I went in search of a cheap and easy DIY recipe. This one actually came off a great little application that I found on my Droid X. It's called Natural Beauty Recipe. It has loads of interesting recipes for hair, nails, lotions, soaps, shampoos and yep, even aftershaves. I'm not positive if this application also has an online website or not. If it doesn't please feel free to get in touch with me and I'll send you a list of the recipes they have on the app.

Alright, on to the recipe now that my ramblings have rambled out.

PhotobucketThis one is so very simple and extremely cheap compared to the name brand aftershaves on the market today. I mean really...who wants to smell like Tim McGraw or Usher anyways?


What You'll Need:
2 Tbsp. Dried Lavender
2 Tbsp. Dried Sage
2 cups Witch Hazel (Wal-Mart brand works just fine)
A glass jar of some sort that has a lid. (I used an alfredo pasta sauce jar I had lying around)
An old aftershave bottle or hot sauce bottle. (This is optional and I used the hot sauce bottle with the beveled opening...worked like a charm)

Put the herbs in the jar first then add the Witch Hazel. Put the lid on the jar and shake the jar like there is no tomorrow. (I felt a bit like a paint shaker when I was done with this step!!) Put the jar in an out of the way spot (just remember WHERE you put it) and let it sit for a week. I flipped the jar daily just to keep things mixed up but the original recipe didn't say you had to. At the end of the week strain the liquid to remove the solid herb material. If you opt to use an after shave bottle or hot sauce bottle go ahead and put the strained liquid into whatever container you chose or put it back into the jar you mixed it in to start with.

Witch Hazel does have somewhat of a stout smell to some so feel free to add a few drops of your favorite essential oil. Don't however over do it.

At the end of this project JB (my hubby) was happy with the finished results, therefore so was I.

Rated:

PhotobucketPhotobucketPhotobucketPhotobucketPhotobucket(5 Peas)


Friday, June 24, 2011

The Shampoo Results Are In!!

The shampoo project turned out amazingly well. Not only that but my house smelled *AWESOME* during the boiling process. All minty and fresh. 
Photobucket
Now that I've gotten that out of my system...on to the ins and outs of actually making the shampoo. 

First let me say that it turns out quite thin. So unless you want to add a thickening agent such as glycerin or xanthum gum you may want to just put it in a spray bottle or maybe even a hot sauce bottle that has either the plastic piece in the top or the beveled opening. (That's the kind of bottle I used for my husband's after shave I made him. Worked out perfectly) *A word to the wise on using glycerin as a thickening agent though. Glycerin dries from the inside out so it may leave your hair shiny and smooth for awhile but over time it will start to dry it out.

I boiled the mint and rosemary in a 2 qt. glass bowl in the microwave for about 15 minutes. Let it sit covered for an hour then strained out the plant material (and of course they don't call me "Grace" for nothing...I managed to dump half of the plant matter onto my kitchen floor during the straining process...GO ME!!!) and added the shampoo just like the recipe said to do. I poured it into some clean Starbucks Mocha Frappuccino bottles (Yes I'm a shameless Starbucks addict and since I dont' have one near me I have to settle with the bottled brand) to let it cool over night. I added a couple of drops of Jasmine essential oil to it the next morning and proceeded to wash my hair with it. My hair feels clean for the first time in a long while. It's soft and manageable and for once in my life it doesn't look like I've reverted to the 80's big hair band look. Not only that but my scalp actually feels clean. In my opinion that is a hard feeling to get with store brand shampoos.

So all in all I am very happy with this DIY Shampoo Recipe. 

Rated:
PhotobucketPhotobucketPhotobucketPhotobucketPhotobucket (5 Peas)


Wednesday, June 22, 2011

Had It To *HERE* With My Hair!!!

     Ok, so I am officially tired of spending copious amounts of money on name brand shampoos that leave my hair either flat and dull or frizzy (you know the "stuck my finger in a light socket" look?) and fried.
                                                      Photobucket

     I've searched the internet up and down to try and find something that's simple and cheap to make. I found out quickly that there are LOADS of DIY sites for everything you can think of...shampoo, conditioner, soap, laundry detergent (Yep, I'm gonna try my hand at making my own laundry detergent too. Stay tuned for that post at a later date.), dish detergent (for hand washing or the dishwasher), lotions, hand soap, even flea shampoos for dogs. So I figure, I will pick the simplest, cheapest one to make and then let you all know how it goes.

Today's project is :

Hair Growth Stimulating Shampoo!!!

     A couple of months back I had the horrible misfortune to get pine sap in my hair. A LOT of pine sap. By the time I could actually DO anything about even attempting to get it out it had worked it's way almost down to the roots of my hair and the only two options I had was turpentine (talk about fried hair) or getting it cut out. I went for what I thought was going to be the lesser of the two evils. Let's just say I was not expecting the results. I ended up with hair about a half inch to an inch long all over my head. To say I was unhappy was a very nice way of putting it and if I was "unhappy" my husband was downright devastated. Well it's growing out but at a much slower rate than my hair normally grows. So this is the recipe I found that seems to be the easiest and cheapest for me at the moment to get my hair growing again. I'll see how it goes and be sure to follow up.


2 cups distilled water
1 cup fresh spearmint
1 cup fresh rosemary
1 cup all-natural, gentle baby shampoo
Essential oil or fragrance oil, your choice, optional (to make it a scented shampoo)
Boil the water with the fresh herbs for about ten minutes, in a glass saucepan (like Visions). Or, you can put in a microwave-safe glass or plastic bowl and heat in the microwave until boiling, and allow to boil for about ten minutes. Then, remove the pot from the stove or bowl from the microwave and cover with a lid and allow to sit and steep for an hour. Strain the liquid through cheesecloth. Mix this with the baby shampoo. Pour into bottles and let set overnight. The next morning you can add some fragrance or essential oil to the shampoo in whatever scent you like the most.


About PnP

I started The Peasant and the Pea as a way to categorize all of the handy little DIY recipes I've come up with and found over the years. V came on board with me and she is just as crazy about making her own stuff as I am. We both firmly believe that everyone can afford to save some money in this day and time, and we hope that by posting these quick little tips, tricks and recipes, that we may just save someone a couple of bucks. We sincerely hope you enjoy our posts and we always love to hear feedback, suggestions or just a comment saying hi. We are always looking for new tips, tricks and recipes as well, so if you have one you want to see posted, shoot us an email. Also, if you have something you'd like to try but would rather someone else be the guinea pig, shoot us an email. We don't mind being test subjects. :)

Thanks for stopping by,
Rey and V

Label Cloud

  © Blogger template 'Ladybird' by Ourblogtemplates.com 2008

Back to TOP